|
|
|
|
VHS/ADAT Maintenance
General A build up of oxide (shed from the tape) on the capstan/pinch roller can damage all tapes played in the machine. The lower edge of the tape has a pulse train recorded on it and that is used to sync the machine. If the lower edge becomes crinkled it can not be read by the Control Head so the tape becomes useless. Do not clean the rubber pinch roller with Isopropyl alcohol Instead, use a cleaner designed for rubber or better yet, replace the pinch roller with a new one. The carbon tipped antistatic brush shown on top of the Upper Drum can sometimes be located on the lower drum, underneath the deck. Its purpose is to remove any static build-up on the drum which would otherwise result in white flecks on screen (VHS). Clean with a cotton bud dipped in Isopropyl alcohol In general, the tape path does not go out of alignment so never be tempted to adjust the Entry and Exit Guide Pole screws. Alignment problems can be caused by foreign objects in the mechanism. I've found children's toys, jewellery and even lumps of burnt toast fouling the mechanism. One very common reason for machines stopping is a worn rubber take-up idler; not shown in diagram. The take-up idler is located between the tape spools. If, after loading a tape, the machine starts but then stops and the tape is wound back into the cassette, pay attention to the right hand spool just before the machine cuts out. If it isn't turning, a worn take-up idler is the most likely cause. Again, clean or replace... it is sometimes possible to affect a cure by turning the take-up idler tyre inside out and refitting it to the idler wheel.
Head Cleaning Cleaning rotary helically scanning heads (VHS/ADAT/Hi8/DAT etc) properly is not difficult but the heads are made of glass and are very delicate so it is essential the correct technique is employed or damage will most likely result.
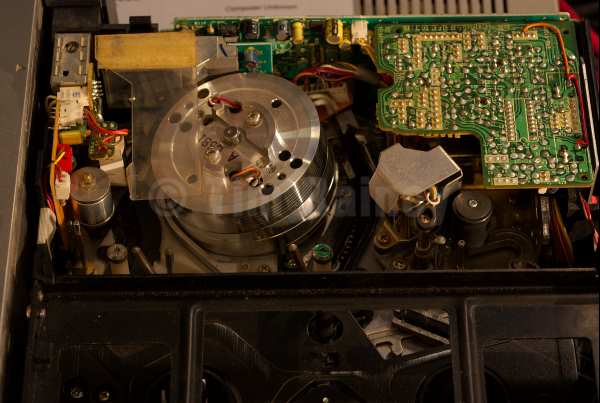
Case removed to gain access to the deck
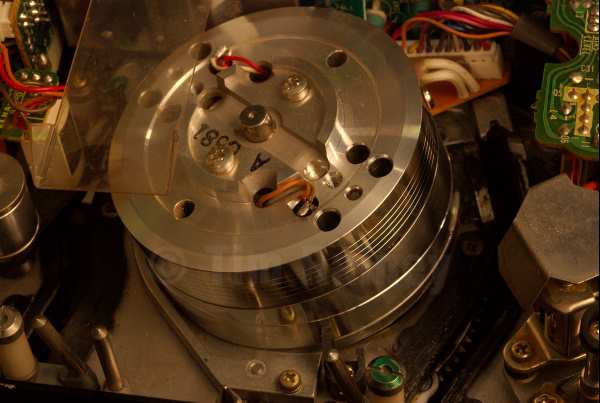
The Upper Drum (Video Heads)
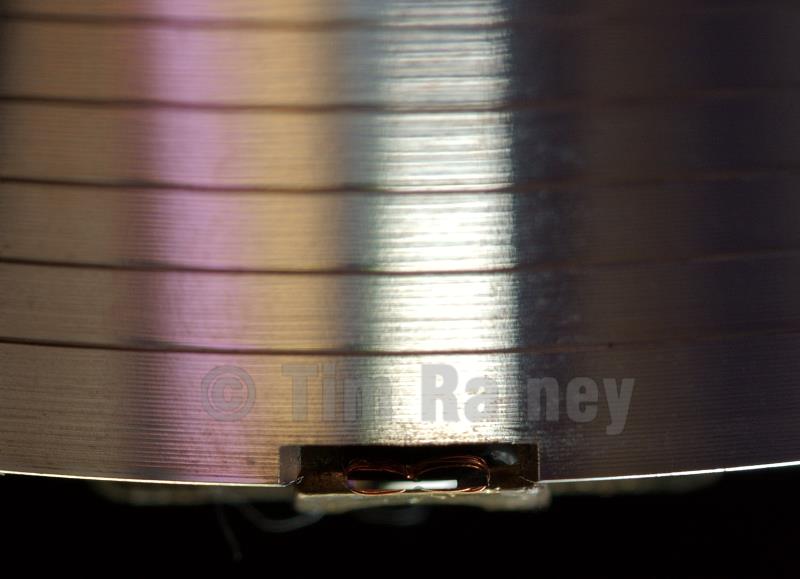
Close up of one of the heads (upper head drum removed from deck for clarity). The actual head is the tiny slither of black glass glinting in the light. You can just see two copper coils around it.
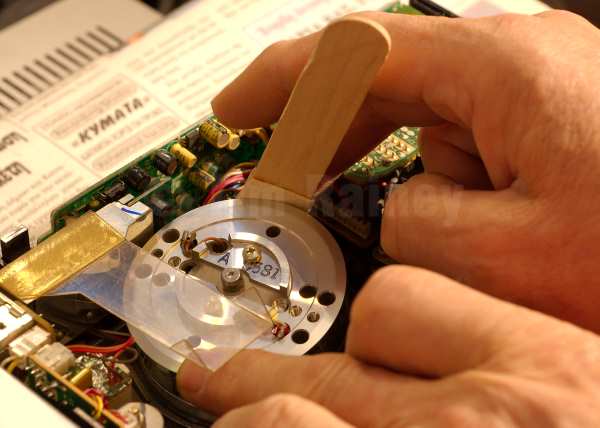
An Isopropyl alcohol soaked chamois coated wooden stick is held lightly against the head drum and the drum is rotated a few times counter-clockwise by hand. It is vitally important that the chamois stick is not allowed to move up or down. Do not touch the shinny grooved sides of the head drum with anything else and certainly never use cotton bubs (see below).
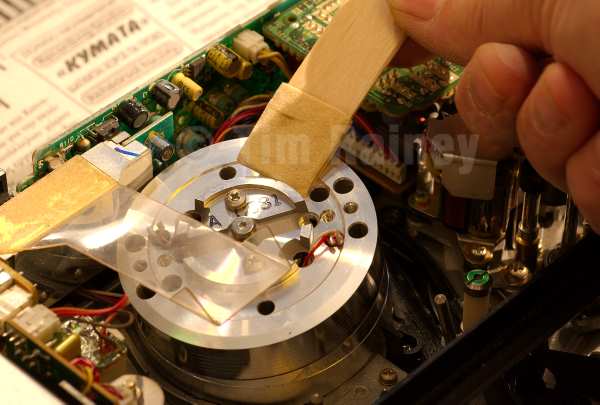
A small oxide deposit has been removed from the heads and is clearly visible on the chamois. This example is fairly clean, it is not uncommon to remove far larger deposits and use two or three chamois sticks in the process. Don't Use Cotton Buds!
Never attempt to clean rotary heads with cotton buds because at best, the cotton fibres can become entangled in the heads and at worst, they can rip the delicate heads clean off (upper head drum removed from deck for clarity).
Repairing Tape Never attempt to join tape to tape because the edge of the join would damage the video heads. Discard any damaged pieces of tape and join good tape back to the clear leader with splicing tape. Getting into a VHS/ADAT type cassette is relatively straight forward:
If you can’t cleanly peel off the spine label, take a sharp craft knife and carefully slice through the label along the join of the two halves of the cassette (shown as dotted line)
Turn the cassette over and remove the five screws whilst keeping the case held together; it tends to want to spring apart
Turn the cassette right side up then carefully lift the top off. Make your repair and lower top cover into place, grip and turn over and replace the five screws
Finish with a new spine label
If you wish to manually withdraw tape from a VHS/ADAT cassette, or turn the spools by hand, insert a small screwdriver in the central lower hole (arrowed) to release the ratchet mechanism; the spools are then free to turn in either direction.
© Tim Rainey 2007 Shameless plug: Nishikigoi Varieties is a 90 minute visual bonanza of beautiful koi carp…read more
|
Feedback, questions and comments welcomeLast updated: 2 January 2010Privacy PolicyPowered by admin© |